Are you eager to bake your own sourdough bread but find metric measurements intimidating? Don’t worry—this article has got you covered! Sourdough bread is not just a delicious, artisanal treat; it’s also a rewarding baking adventure. With a simple sourdough bread recipe in cups not grams, you can easily measure ingredients using standard kitchen tools, making the process more approachable for beginners. Sourdough bread is unique because it relies on natural fermentation, which gives it its signature tangy flavor and airy texture. Whether you’re a seasoned baker or a complete novice, this guide will walk you through everything you need to know to create a perfect loaf of sourdough bread. From understanding the basics of sourdough starters to mastering the art of kneading and shaping, we’ll ensure your bread turns out as good as (or better than!) what you’d find at a bakery.
One of the key advantages of using cups instead of grams is that it simplifies the process, especially for those who don’t own a kitchen scale. While precision is crucial in baking, cups provide a convenient alternative that still yields excellent results if used correctly. This article will also delve into tips for maintaining your sourdough starter, troubleshooting common issues, and customizing your bread to suit your taste. By the end, you’ll not only have a foolproof recipe but also the confidence to experiment and make sourdough baking a regular part of your routine. Let’s dive into the wonderful world of sourdough and discover how easy it can be to bake your own bread!
Before we proceed further, let’s take a moment to organize the structure of this guide. Below, you’ll find a detailed table of contents that outlines the various sections of this article. This will help you navigate through the content seamlessly and find the information you need quickly.
Read also:Carrie Underwoods Athletic Journey Exploring Her Love For Sports
Table of Contents
- What Makes Sourdough Bread Special?
- How to Create and Maintain a Sourdough Starter?
- Step-by-Step Sourdough Bread Recipe in Cups Not Grams
- Why Is Kneading and Shaping Important for Sourdough Bread?
- Common Mistakes to Avoid When Baking Sourdough
- How Can You Customize Your Sourdough Bread?
- What Are the Health Benefits of Sourdough Bread?
- Frequently Asked Questions About Sourdough Baking
What Makes Sourdough Bread Special?
Sourdough bread has captivated the hearts (and taste buds) of bakers and food enthusiasts alike for centuries. Unlike conventional bread that relies on commercial yeast, sourdough uses a natural leavening agent known as a sourdough starter. This starter is a living culture made from flour and water, teeming with wild yeast and beneficial bacteria. The fermentation process not only gives sourdough its characteristic tangy flavor but also contributes to its superior texture and aroma. The bubbles created during fermentation make the bread light and airy, while the crust develops a satisfying crunch that’s hard to resist.
Another reason sourdough stands out is its versatility. Whether you’re baking a classic loaf, experimenting with whole grains, or adding seeds and herbs, sourdough adapts beautifully to your preferences. Moreover, the slow fermentation process breaks down gluten and phytic acid, making it easier to digest for some individuals. This is why sourdough is often recommended for those who experience mild discomfort with regular bread. Plus, the act of baking sourdough can be incredibly therapeutic. Watching your starter come to life and transform simple ingredients into a delicious loaf is a fulfilling experience that connects you to generations of bakers who have done the same.
For those new to sourdough, the idea of maintaining a starter might seem daunting. But don’t let that deter you! Once you understand the basics, it becomes second nature. With a sourdough bread recipe in cups not grams, you can easily measure ingredients without worrying about precision scales. This accessibility makes sourdough baking more inclusive and enjoyable for everyone. So, what are you waiting for? Let’s explore how to create and maintain your very own sourdough starter in the next section.
How to Create and Maintain a Sourdough Starter?
Creating a sourdough starter is the first step toward baking your own sourdough bread. Think of the starter as the heart of your bread—it’s what gives it life and flavor. To begin, you’ll need just two ingredients: flour and water. The process is simple but requires patience and consistency. Start by mixing equal parts of flour and water (about ½ cup of each) in a clean jar or container. Cover it loosely with a lid or cloth and let it sit at room temperature for 24 hours. This initial mixture will begin to attract wild yeast and bacteria from the environment.
What Should You Look for in a Healthy Starter?
After the first 24 hours, you’ll need to “feed” your starter daily. Feeding involves discarding about half of the mixture and adding fresh flour and water (again, ½ cup of each). Within 5–7 days, your starter should become bubbly, slightly sour-smelling, and ready to use. A healthy starter will double in size within 4–6 hours after feeding, indicating that it’s active and strong. If you notice a layer of liquid (called “hooch”) forming on top, don’t worry—it’s a sign that your starter is hungry and needs to be fed more frequently.
Troubleshooting Common Starter Issues
While creating a starter is straightforward, a few challenges might arise. For example, if your starter isn’t bubbling, it could be due to low temperatures or insufficient feeding. Try moving it to a warmer spot or feeding it twice a day. On the other hand, if your starter smells unpleasantly sour or alcoholic, it might be overfed or too warm. Adjust the feeding schedule accordingly. Once your starter is ready, you can use it in your sourdough bread recipe in cups not grams, ensuring consistent results every time.
Read also:Benjamin Millepied And Camille Eacutetienne A Dynamic Duo In Art And Activism
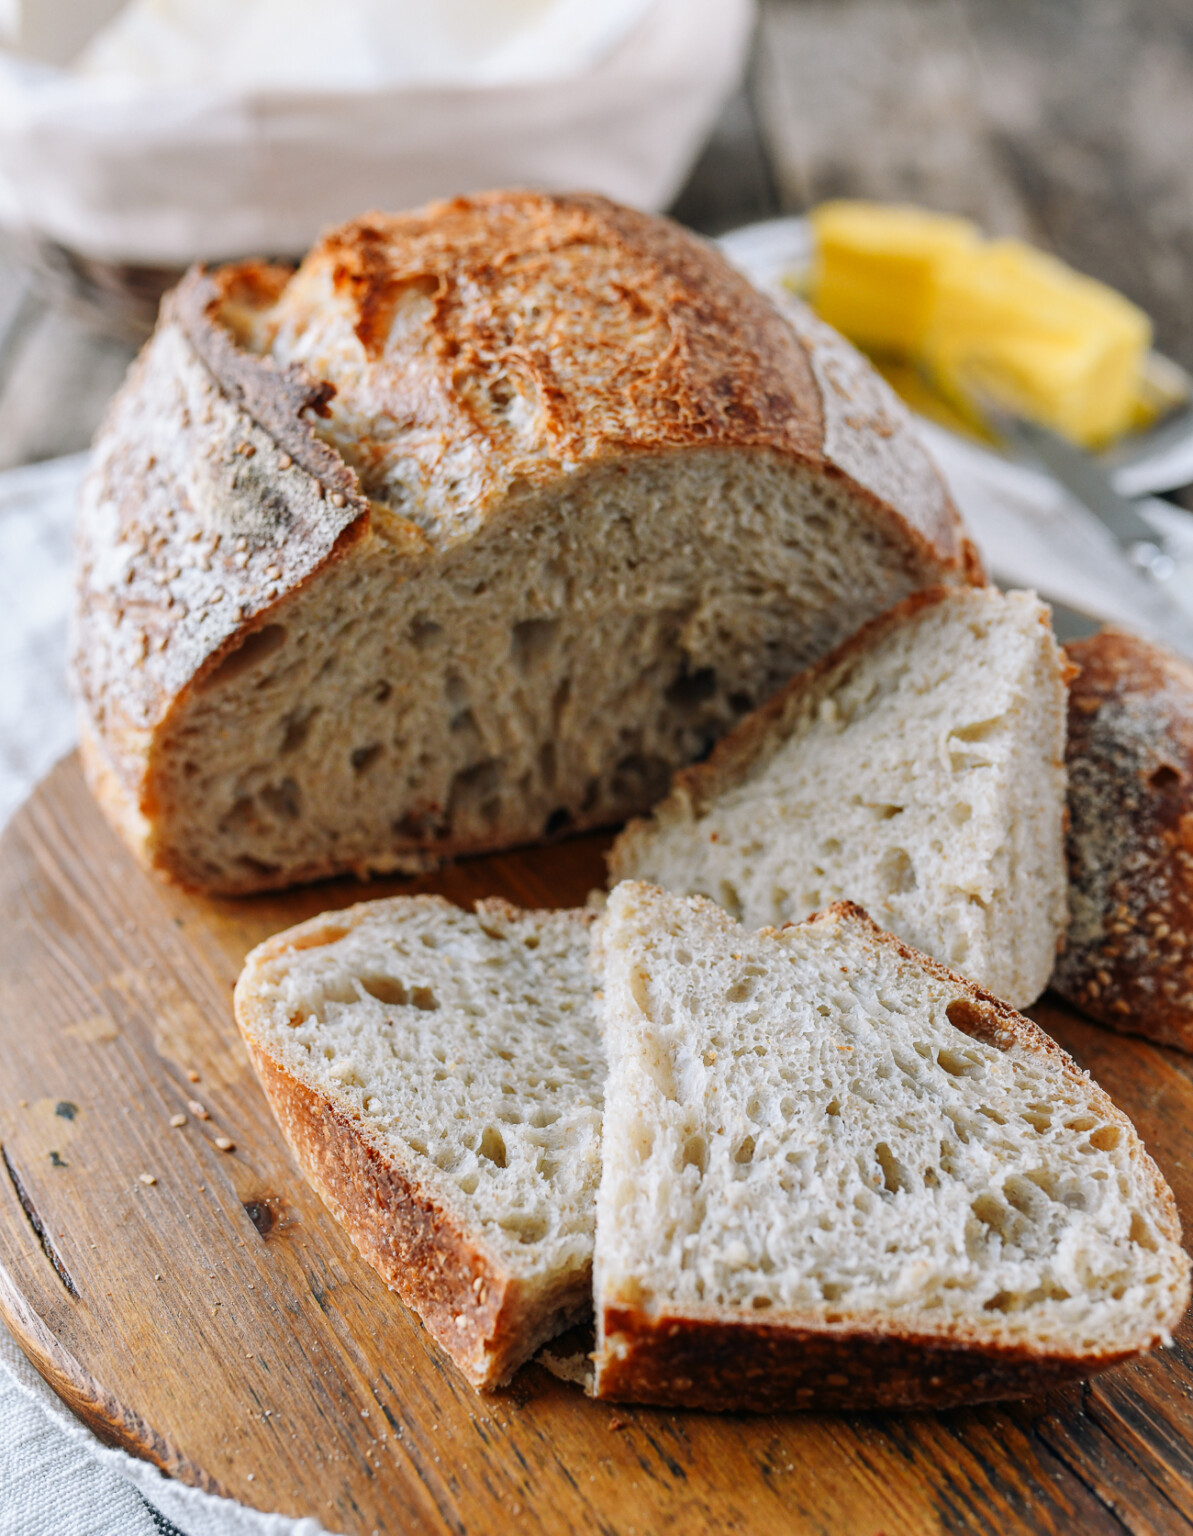
Step-by-Step Sourdough Bread Recipe in Cups Not Grams
Now that you have a thriving sourdough starter, it’s time to put it to work! This step-by-step sourdough bread recipe in cups not grams is designed to simplify the process while delivering a delicious, bakery-quality loaf. Gather your ingredients: 1 cup of active sourdough starter, 3 cups of all-purpose flour, 1½ cups of water, 1½ teaspoons of salt, and a little extra flour for dusting. Begin by combining the starter and water in a large mixing bowl. Stir until the starter dissolves completely, creating a uniform mixture.
How Do You Achieve the Perfect Dough Consistency?
Gradually add the flour to the starter-water mixture, mixing with a wooden spoon or your hands until a shaggy dough forms. Sprinkle the salt over the dough and continue mixing until it’s fully incorporated. The dough should feel slightly sticky but manageable. If it’s too dry, add a tablespoon of water; if it’s too wet, sprinkle in a bit more flour. Once the dough comes together, cover the bowl with a damp cloth and let it rest for 30 minutes. This resting period, known as autolyse, allows the flour to absorb the water, making the dough easier to work with.
Shaping and Proofing: The Final Steps
After the initial rest, turn the dough out onto a lightly floured surface and knead it for about 10 minutes. Kneading develops gluten, which gives the bread its structure. Once the dough is smooth and elastic, shape it into a ball and place it in a floured proofing basket or bowl. Cover it with a cloth and let it rise at room temperature for 4–6 hours, or until it doubles in size. For a richer flavor, you can also refrigerate the dough overnight. When ready, bake the bread in a preheated oven at 450°F (230°C) for 30–35 minutes, or until the crust is golden brown and the loaf sounds hollow when tapped.
Why Is Kneading and Shaping Important for Sourdough Bread?
Kneading and shaping are two critical steps in the sourdough bread-making process. Kneading ensures that the gluten in the dough develops properly, creating a strong network that traps air bubbles during fermentation. This results in a light, airy loaf with an appealing crumb structure. Without adequate kneading, your bread may turn out dense and flat. Shaping, on the other hand, gives the dough its final form and helps create surface tension, which contributes to a well-risen loaf with a beautiful crust.
When shaping your dough, aim for a tight, smooth surface. This not only improves the bread’s appearance but also helps it expand evenly during baking. Use a bench scraper or your hands to gently stretch and fold the dough, tucking the edges underneath to form a round or oblong shape. Dust the surface with flour to prevent sticking, but avoid using too much, as it can interfere with the dough’s texture. With practice, you’ll develop a feel for shaping and achieve consistent results every time.
Common Mistakes to Avoid When Baking Sourdough
Even experienced bakers can encounter challenges when working with sourdough. One common mistake is underfeeding or neglecting the starter. A weak or inactive starter can lead to poor rising and lackluster flavor. Another pitfall is rushing the fermentation process. Sourdough requires time to develop its full potential, so patience is key. Overmixing the dough is another issue to watch out for, as it can overwork the gluten and result in a tough loaf.
What Are Some Tips for Perfecting Your Loaf?
To avoid these pitfalls, follow these tips: First, maintain a consistent feeding schedule for your starter, especially in the days leading up to baking. Second, allow the dough to proof fully, even if it takes longer than expected. Third, use a Dutch oven or baking stone to create a steamy environment in your oven, which helps achieve a crisp crust. Finally, experiment with different flours and techniques to find what works best for you. With practice, you’ll master the art of sourdough baking and enjoy countless delicious loaves.
How Can You Customize Your Sourdough Bread?
One of the joys of baking sourdough is the endless possibilities for customization. Want to add a nutty flavor? Try incorporating whole wheat or rye flour into your sourdough bread recipe in cups not grams. For extra texture, mix in seeds like sunflower, flax, or sesame. Herbs and spices such as rosemary, thyme, or garlic can elevate your loaf to gourmet status. You can even experiment with sweet additions like dried fruit or chocolate chips for a unique twist.
How to Incorporate Add-Ins Without Compromising Texture?
When adding mix-ins, it’s important to fold them into the dough gently to avoid deflating it. Add-ins should be incorporated during the final stages of kneading or shaping. For best results, use ingredients that are dry or lightly toasted to prevent excess moisture from affecting the dough. With a little creativity, you can tailor your sourdough bread to suit any occasion or preference.
What Are the Health Benefits of Sourdough Bread?
Sourdough bread isn’t just delicious—it’s also nutritious. The fermentation process breaks down phytic acid, a compound found in grains that can inhibit nutrient absorption. This makes sourdough easier to digest and more nutrient-dense than conventional bread. Additionally, the probiotics present in sourdough support gut health, promoting a balanced microbiome. For those sensitive to gluten, sourdough’s lower gluten content may be easier to tolerate.
Frequently Asked Questions About Sourdough Baking
How Long Does It Take to Make Sourdough Bread?
From start to finish, sourdough bread typically takes 2–3 days, including starter preparation and fermentation. However, the hands-on time is minimal, making it a convenient option for busy bakers.
Can I Use All-Purpose Flour for My